Deploy Frontity using Vercel
In their own words : Vercel is a cloud platform for static sites and Serverless Functions that fits perfectly with your workflow. It enables developers to host Jamstack sites and web services that deploy instantly, scale automatically, and requires no supervision, all with no configuration.
We strongly recommend this service as it is serverless, cheap, includes CDN, and really easy to set up.
It also supports the cache technique stale-while-revalidate (which they call Serverless Pre-Rendering). This is a powerful way to improve your site speed.
Table of Contents
Signup and Login into Vercel
To be able to deploy with vercel you need to have a Vercel account. You can signup here.
Once you have an account you have to login to Vercel from the terminal.
Deploy your site under a Vercel domain
Deploying to Vercel is really easy and all the required configuration for Frontity projects is automatically set for you via a vercel.json file.
So, to deploy your Frontity site under a Vercel domain you have to:
Signup and Login (if you haven't already).
Create a vercel.json file
vercel.json fileCreate this vercel.json file and save it in the root of your Frontity project.
@frontity/now is a Frontity builder created especifically for Vercel. It encapsulates all the actions that need to be triggered on Vercel servers when deploying a Frontity project
Run deployment
Deploy Frontity using the vercel command (from the root of your project):
You should get something like this
More about Vercel scopes
Vercel will assign you a domain (something like your-project-name.vercel.app) that that will allow you to check your site online.
From the above deployment example we got the following URL's:
Live URL:
https://my-frontity-project.vercel.app→ Our temporary URL assigned automatically by Vercel, We can check (and share) our site online from this URLInspect:
https://vercel.com/vercel-username/my-frontity-project/settings→ Here we can check the status of our site and check the logs among other thingsProject Settings:
https://vercel.com/vercel-username/my-frontity-project/settings→ Here we can change domain and build settings among other things
Deploy your site under a custom domain
To deploy your site in Vercel under a custom domain you have to:
Deploy your site under a Vercel domain (if you haven't already).
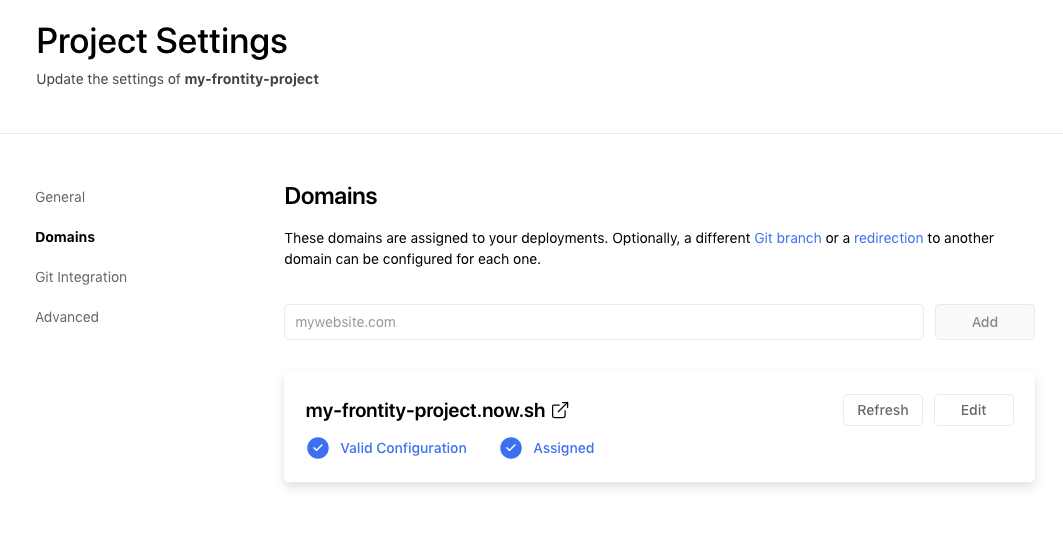
Add your custom domain to your Vercel project settings
By visiting the project settings URL provided in our previous deployment (https://vercel.com/vercel-username/my-frontity-project/settings in our example above) we can set a custom domain.

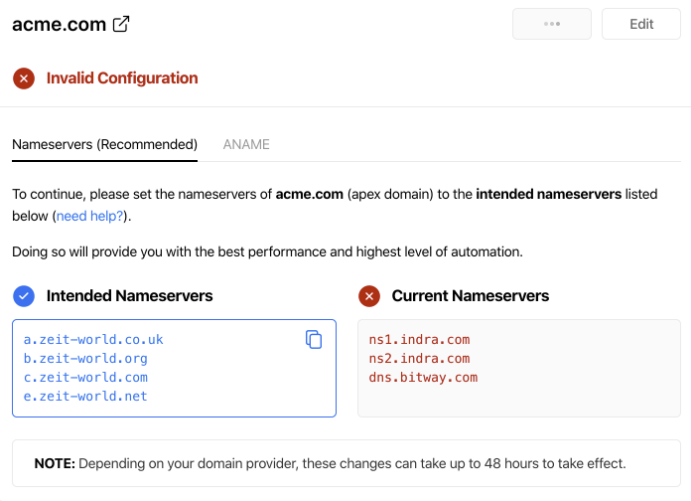
Add it, and you will be provided with a set of nameservers that you can use in your domain provider's configuration to point your custom domain to the Vercel nameservers.

Add a subdomain for your WordPress source
A subdomain can be used to separate your WordPress and Frontity deployments. They can be created within the Vercel dashboard under the domains section.
To setup a subdomain for your WordPress source, simply select your desired domain from the list and add a new DNS Record with type A and the IP address of your WordPress server.
Add Vercel nameservers in your domain provider
You need to set Vercel nameservers as custom DNS of your custom domain from your domain provider site.
If you don't know how to do this, contact your domain provider (GoDaddy, CloudFlare, etc)
Deploy
Finally, deploy Frontity using this command (from the root of your project):
You should get something like this
This will create a deployment and assign it to your real site URL.
More about Vercel deployments
Vercel and HTTPS
Vercel now forces all apps to be served over HTTPS. You therefore need to ensure that your WordPress site has a SSL certificate and that you connect to your WordPress API endpoint using HTTPS rather than HTTP.
The effect of using a HTTP only connection on a Frontity project deployed on Vercel will result in navigation links not working and getting stuck in the data.isFetching state (although apparently working on the local dev machine). The reason is that Frontity won't be able to fetch the content from the WordPress backend over HTTP on a pure HTTPS site.
Still have questions? Ask the community! We are here to help 😊
Last updated